Whip a dip so good you’ll flip! <br>Strawberry Cheesecake Dip - Mulligatawny Soup - Chocolate Mousse Pie </br>Little Piece of my Heart - Dressed to Impress; Mastering Classic Vinaigrette - Pop Quiz! What’s the best way to uncork Champagne?  </br> Michael DeLoach -

Friendship and Truffles: The Perfect Pairing

Chocolate-Kahlua Truffles


My late friend and cook extraordinaire, Leela Manilal, always enjoyed the luscious chocolate desserts at my table—especially the truffles. She once asked if I would teach her how to make them, and I knew that my favorite chocolate-Kahlúa truffles would be the perfect place to start. They are easy for beginners and offer a sophisticated depth of flavor that satisfies the most devout truffle lovers, including Leela.

I took her into my kitchen where she spied a large block of chocolate and pitcher of cream on the table. She stared for a moment and said, “That’s it? How can two basic ingredients produce perfection?” The secret I noted is in the chocolate. Always use best quality brands like Valhrona, Scharffen Berger or my personal favorite, Barry Callebaut. All are easily available at good grocery stores, online baking supply sites or kitchen stores. Inexpensive supermarket chocolate is not worth your time or money in this instance.

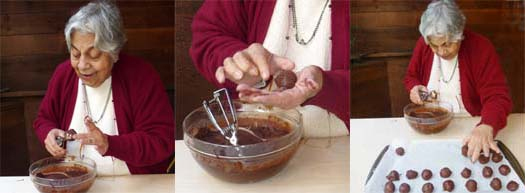
Leela Manilal making chocolate-Kahlua truffles.


I handed Leela a sharp chef’s knife and showed her how to chop the chocolate into small, uniform pieces so that it would melt evenly. “Barbara, that’s so much chocolate. Is this really necessary?” If you leave large chunks, they won’t melt completely and you could have lumpy truffles.

Lumps seemed almost inevitable when I poured the hot cream over the chocolate. As any experienced truffle maker knows, this step instantly creates an alarming mass of puddles and chocolaty blobs. “Now what?” asked Leela in frustration. “It’s a muddy mess!” I handed her a whisk and reassured her all would be well.

As Leela whisked with a vengeance, I told her how an assistant to culinary great, Auguste Escoffier, invented chocolate truffles when he made a huge mistake in his kitchen over 80 years ago. The assistant was whipping up some chocolate pastry cream and not paying attention as he accidentally poured hot cream over a bowl of chocolate pieces. Sacre bleu! What to do? Soon the melting chocolate absorbed the cream and cooled into the malleable mixture that we know as ganache. Reluctant to waste expensive ingredients, the assistant scooped and formed the ganache into lumpy, bumpy balls and rolled them in cocoa powder. The resulting confection strongly resembled truffles those rare, highly prized fungi dug up in parts of France and Italy. Voila! Chocolate truffles were born.

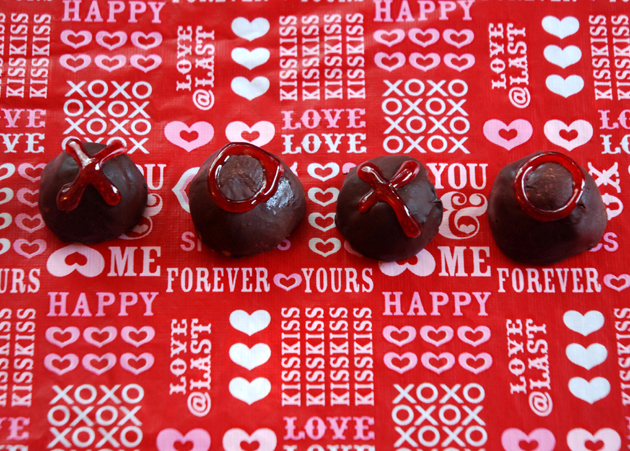
Today, there are hundreds of truffle variations as cooks flavor them with Grand Marnier, Kahlúa, brandy, whiskey, a variety of wines, liqueurs and extracts and coat them with crushed nuts, cocoa powder, chocolate shavings, sugars and spices—or dip them into warm liquid chocolate.

Soon Leela’s hard work was rewarded, as the mixture came together into a satiny smooth batch of perfect ganache. I handed her a quarter cup of Kahlúa to flavor the mixture. “That isn’t much,” she observed. Therein lies the secret to flavoring truffles: always go easy. There is nothing worse than those that reek of alcohol or send you into hand-flailing contortions with over-the-top taste. Be especially careful with flavorings designed for serious bakers, as they are more intense than the supermarket extracts we are all familiar with.

Once the ganache sets in the refrigerator, creating uniformed sized truffles is easy with a one and one-quarter-inch ice cream scoop. Perfectionist Leela struggled to roll perfectly round balls between her warm hands—with messy results. I laughed as she held up her chocolate-covered hands, looking much like a kid making yummy mud pie. Before long, she learned to embrace the imperfections of a quick scoop, working swiftly to keep the ganache cool, firm and easy to handle. Since this was a lesson, I had Leela roll some of her truffles in chopped pistachios while others got a dusting of cocoa powder. For the tour de force, I gave her a bowl of molten chocolate with two forks for dipping the remaining truffles. To my mind, there is nothing better than double chocolate.

Packing up the truffles was bittersweet because Leela was leaving for her home in New Delhi, India the next day. I slipped a pound of Callebaut chocolate into her suitcase and knew that she would spread the magic of truffles to her family and friends. It was one of the last time we cooked together before she passed away after a valiant fight against cancer. Today, I think of her every time I make truffles and know that she would love muddying her hands with all that delicious chocolate cream.

Get a printable Chocolate-Kahlúa Truffles for easy reference.

Refer to my illustrated, step-by-step instructions on  How To Chop Chocolate for Melting and How To Melt Chocolate.


Fruit simmered in wine? Divine.

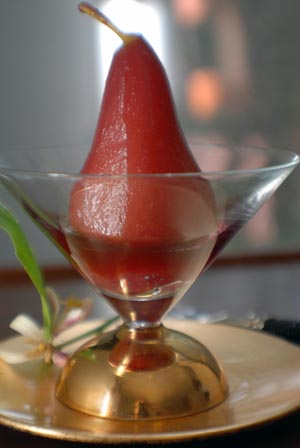
Beyond Wonderful Poached pears in red wine.

A beautifully poached pear in red wine is at once simple and a culinary work-of-art. Dressed up with a fragrantly spiced, ruby-red reduction sauce and freshly whipped cream, it dazzles the eyes while blithely dancing over one’s taste buds.

At first glance you might think it a shi-shi, labor-intensive dish best enjoyed at a restaurant. Nothing could be further from the truth, especially when you know the secrets to success—and that it’s the ultimate make-ahead dish.

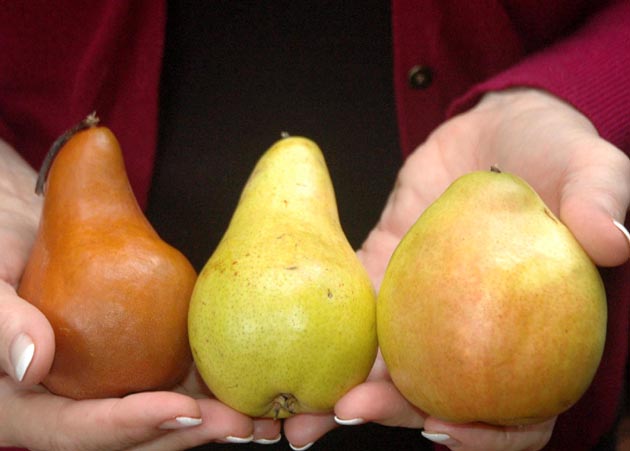
Beyond Wonderful pears for poaching.

Let’s start with the pear itself. With so many choices available in the markets, know that firmer pears such as sweet and juicy Anjou, Bosc and Concord hold their shapes well when heated. Bartletts (red and yellow), Comice and Starkrimson, while tasty, are best saved for eating fresh.

And the thing most recipes don’t tell you: size matters. Select small to medium-sized pears comfortably eaten in one sitting. There is nothing worse than wowing everyone at your table with these beauties, only to have them moaning and complaining that it’s too much to enjoy.

As you sort through all the produce bins, notice that most pears are rock hard and inedible. That’s because they are typically picked before their prime to better withstand the rigors of shipping. Don’t be nervous about buying hard pears; you can let them soften on your kitchen counter with excellent results.

Make sure your pear is nicely ripened before poaching: Apply gentle pressure to the neck and bulbous portions. Both should be of equal firmness, yielding just slightly to pressure. Do not wait for the fruit to soften significantly or change color—these are signs that it is overripe. If you don’t plan to poach the pears immediately, extend their shelf life by storing them in the refrigerator 3–5 days.

Back in the kitchen, poaching pears is super easy when you know these tips.

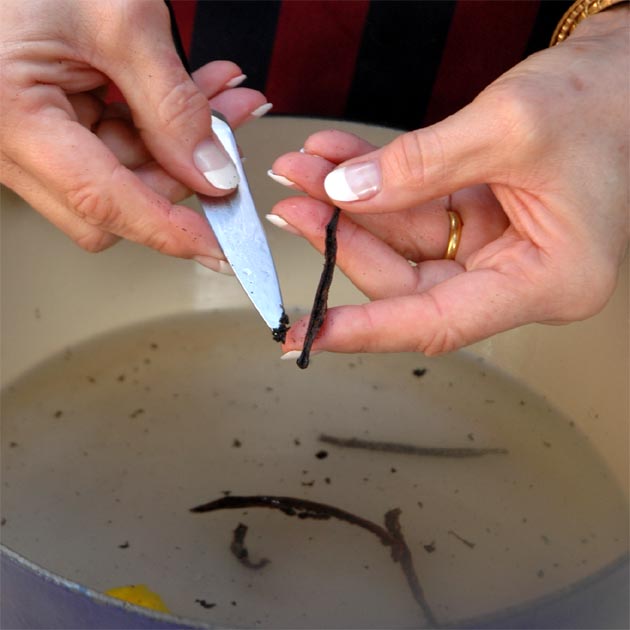
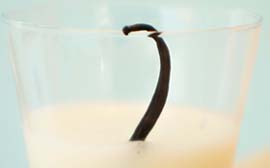
Vanilla bean for poached pears.

1. Choose a fragrant, supple vanilla bean. Avoid the dry twig like ones unless they are your only option. Need help with vanilla beans? Print out my illustrated, step-by-step instructions on  How To Split and Scrape a Vanilla Bean.

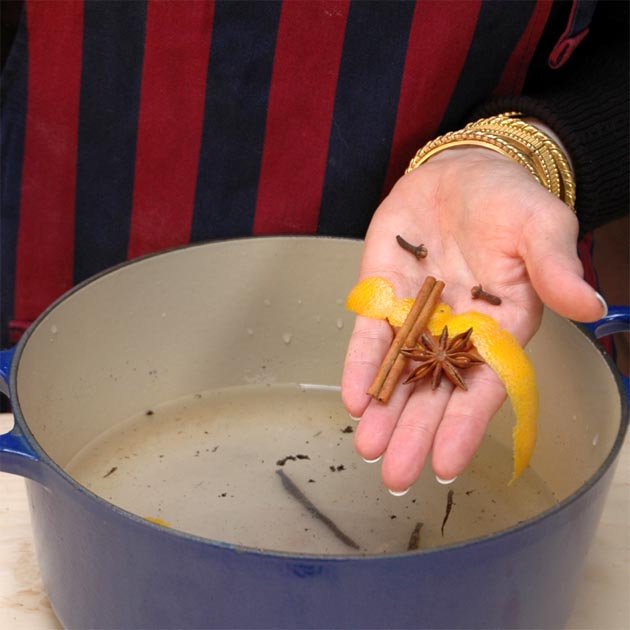
Spices for poached pears in red wine liquid.

2. Collect the  spices and orange zest. Never zested oranges before? Not to worry. Print out my illustrated and How To Zest Citrus.

Slice bottoms of pears for poaching.

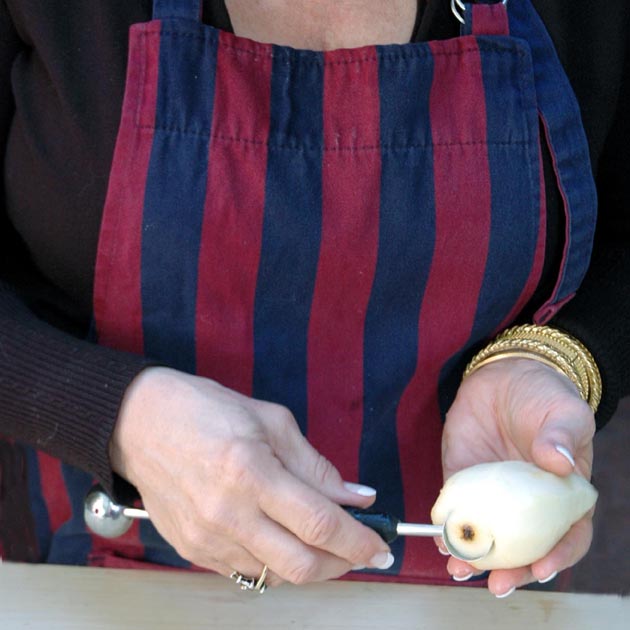
3. Cut a small slice from the bottom of the pear before poaching to give it a stable base. Then watch it stand tall on the plate, with no “whoops” at your table.

Parchment paper over pears for poaching.

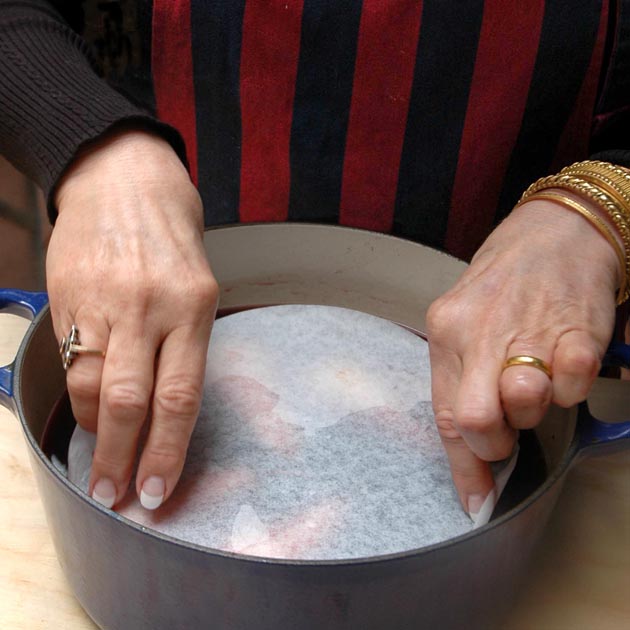
4. Bobbing pears can lead to uneven cooking. Laying a piece of parchment paper over the pears as they cook keeps them in their place. Either purchase packaged pre-cut circles or, cut one slightly smaller than the diameter of the poaching pot.

Testing poached pears for doneness.

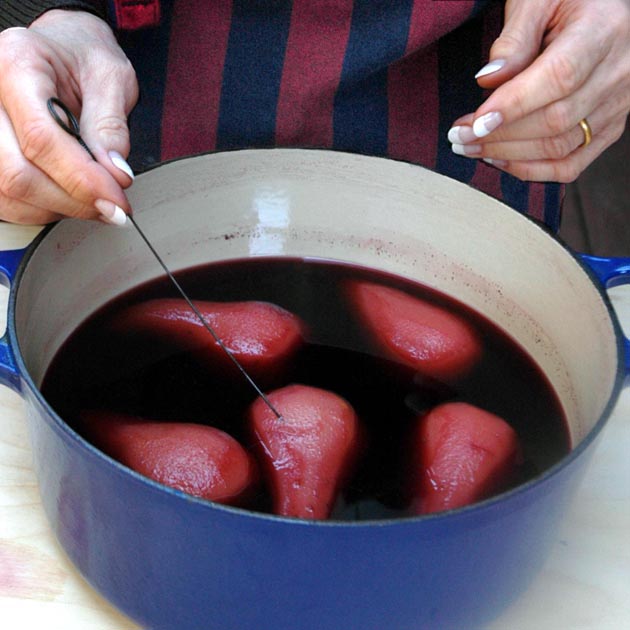
5. Keep pears from overcooking by removing them from the hot poaching liquid as soon as a toothpick inserted glides through easily. Mushy pears taste fine, but ding easily and make a less-than-pretty presentation.

Preparintg poached pears for refrigeration.

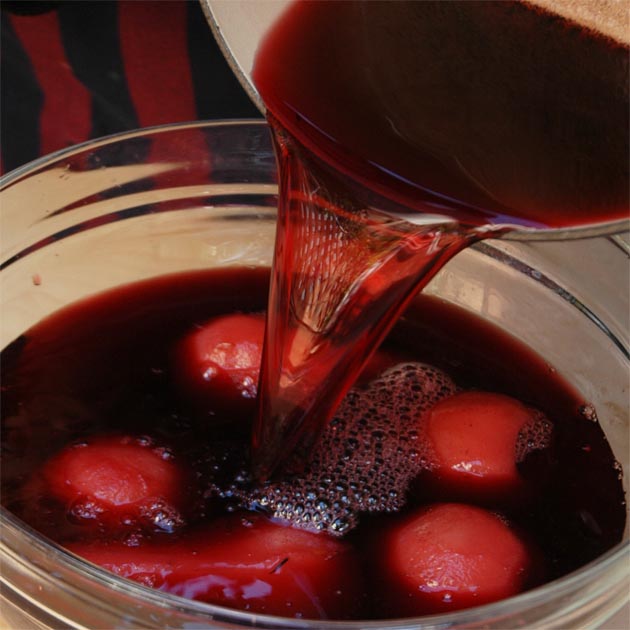
6. You can save time on the day of a special event by poaching the pears one to two days in advance, then refrigerating them in their liquid. To prevent overcooking, remove the pears from the pot as soon as they’re tender, then allow the syrup and fruit to cool separately. Return the pears to the cooled liquid, cover and refrigerate. Know that varieties like Bosc and Anjou keep as long as four to five days, but lose some of their lovely spiceness.

7. When it comes to accompaniments, don’t let the idea of a reduction sauce put you off. The recipe offered here is not temperamental, won’t break and adds a sophisticated flavor to the finished dessert. You don’t need much. I start with one half cup of poaching liquid for each pear. Reduced to a quarter cup, it provides just enough goodness to spoon a small pool into a pretty serving bowl and drizzle the remainder over the pear.

8. You may be tempted to use chocolate sauce on this pear: don’t. Know that I love chocolate sauce—the really good stuff made from best-quality chocolate and cream—but it’s not a great pairing here. The rich, spicy reduction sauce complements the pear well and sends your taste buds soaring. Chocolate muddies the experience, ultimately boring the palate.

9. …and now, a sinfully good little secret for using leftover poaching liquid: sorbet. Prepare an extra pear and place it in a blender with the liquid, then blitz until smooth. Process in an ice cream maker according to manufacturer’s instructions. Absolute heaven!

Print out illustrated, step-by-step copies of  How To Split and Scrape a Vanilla Bean and How To Zest Citrus,  and the recipe Poached Pears in Red Wine for your convenience.


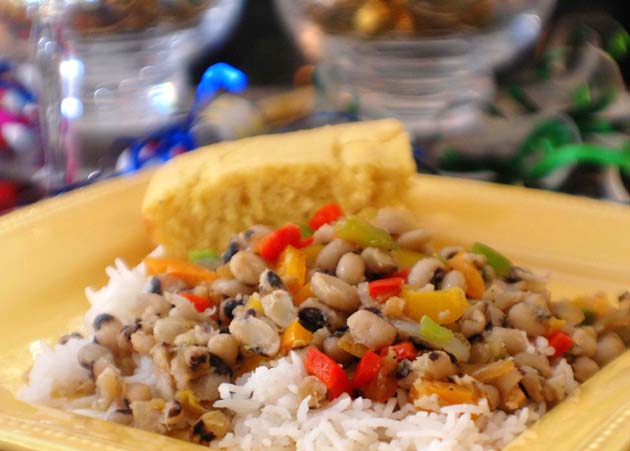
Hoppin’ John New Year’s Good Luck Dinner.

Hoppin John and Rice New Year's Eve good luck dinner.

Happy New Year! Are you hungry? I just got back from the market with all the ingredients for my favorite New Year’s good luck meal: hoppin’ john (black-eyed peas), rice, collard greens and a pan of piping hot corn bread. Whether you buy into the promise of good luck or not, this is one tasty, economical meal to usher in 2013.

This popular southern meal was first introduced to me by my late father-in-law, Felix Adams. He knew that I would love it and wanted someone to joyfully carry on his Mississippian family tradition. As I devoured my first plate, Felix told me how this good luck meal was originally prepared by West African slaves on the rice plantations of South Carolina’s Gullea area for their families. They combined locally grown legumes known as cowpeas (basically black-eyed peas) with rice, then flavored everything with pork and simple seasonings. Collard greens came to symbolize economic prosperity, and corn bread is just plain good.

While slave cooks had long appreciated the value of black-eyed peas, it took a recipe in Sarah Rutledge’s 1847 cookbook, The Carolina Housewife to get the attention of the upper-class southern ladies. Today the dish is sometimes served with Champagne at the stroke of midnight. Some tuck a coin into the mixture before serving, believing that the lucky recipient will have an especially fortunate new year. Personally, I think that if you’re willing to risk choking to death or breaking a tooth during a ruckus celebration, you’re going to need all the luck you can get.

Today, I keep my hoppin’ john fairly traditional but make it more festive by cutting in red, orange, yellow and green bell peppers to resemble New Year’s confetti. Plate it with the brilliant green collards and deep golden corn bread, and you have a meal that is as beautiful as it is delicious.

Here’s to a prosperous, healthy, happy new year with lots of good eating in 2013.

Print out a copy of Hoppin’ John and Rice for your convenience.


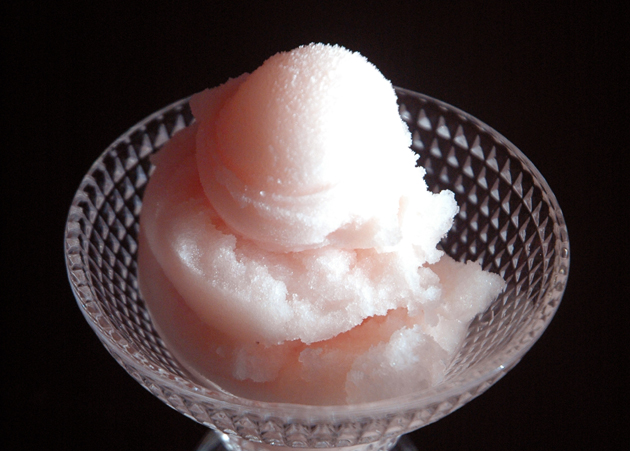
Grapefruit-Champagne Sorbet

desserts_sorbet_grapefruitchamp_630x451

I love this icy cold grapefruit-champagne sorbet, especially after a rich or spicy meal. Pretty and pink, its unique flavor shines bright with Ruby Red grapefruit juice and bubbly sweetened with simple syrup. Nothing could be easier to prepare especially when you know a few tricks.

  1. Buy an inexpensive bottle of champagne or sparkling wine for this and save the good stuff for drinking. This is also a great way to use up partially used bottles from your New Year’s celebration.
  2. Use freshly squeezed grapefruit juice; never ever think about bottled, canned or frozen juices as they won’t provide the same bright flavor. Never.
  3. Ruby Red grapefruits are my favorite for this sorbet because they are juicier and sweeter than many varieties and impart a soft, wintery pink color. Ruby Red’s are in the markets year round but plentiful this time of year through early spring. If they are unavailable in your area substitute any grapefruit of choice.
  4. Make your own simple syrup—it’s easy and cost pennies. My recipe calls for more sugar than some because it helps maintain the delicate flavor often lost in the freezing process.
  5. Grapefruit-champagne sorbet is a great make-ahead dessert. Chill all the ingredients 4–6 hours before processing in your ice cream maker. Once finished, harden the sorbet overnight in the freezer. Both steps are key to success.

Simple. Elegant. Delicious. So cool.


Print a copy of Grapefruit-Champagne Sorbet for your convenience.


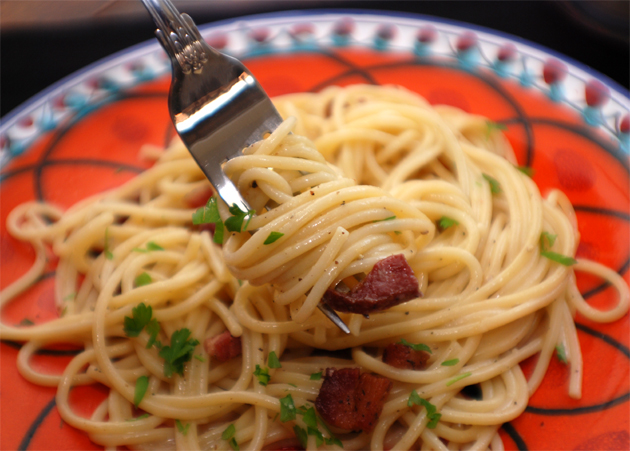
Blissfully Basic: My Favorite Spaghetti Carbonara

Spaghetti Carbonara


Oh, how I love spaghetti carbonara twirled on to my fork, then lustily devoured and slurped while plucking crispy pieces of pancetta off the plate with my fingers. No napkins required. Besides being delicious, this pasta dish is the perfect embodiment of one of my favorite cooking principles: Simplicity rules!

Carbonara is an Italian classic that first appeared in the 1940s—exactly where is debated by food historians. My favorite theory has the Allied soldiers of World War II sharing their humble rations of powdered eggs and bacon with the local, hungry population of war-torn Italy. The Italians supplied dried pasta, and together they all prepared a dish that both nourished and gave them a sense of community. The soldiers became so fond of pasta carbonara that when they returned home to their respective countries, they introduced the dish to their families and local restaurants. These days you’ll find all kinds of spaghetti carbonara on restaurant menus; dressed up with cream and onions or speckled with peas. But traditional cooks—and I’m one of them—swear by five simple ingredients: pasta, cured meat, cheese, eggs and black pepper.

Alas, simplicity is often complicated with unnecessary snobbery as some cooks insist that only specific cured meats and cheeses merit the name carbonara. In Italy, particularly Rome, diners prefer their locally available guanciale and push it as the only true cured meat for carbonara. This very fatty, mild-tasting meat is made from unsmoked pig’s cheeks or jowls and must be cut in small, matchstick pieces to capture the striations of meat. While reasonably priced at six dollars a pound at my local Italian market, guanciale is often hard to find and requires an adventurous spirit.

My favorite is pancetta, an unsmoked, flavorful Italian bacon that adds tasty morsels of meat to the carbonara rather than crunchy pieces of fat. It runs around 16 dollars a pound—or eight bucks for this recipe—and is well worth the extra expense.

If you want to send food snobs wickedly over the edge, use readily available smoked slab bacon (that reminds one of bacon and eggs for breakfast). It costs around seven dollars a pound, or $3.50 for this dish. I don’t know about you, but if I get a hankering for carbonara and can’t have my favorite pancetta, I’ll fry up bacon in a heartbeat.

The cheese is fairly easy. Italians often prefer percorino romano; a salty sheep’s milk. Others—myself included—like parmesan-reggiano, the richly flavored, nutty tasting cow’s milk cheese from Parma, Italy. Try them both and then decide your favorite; you may even want to mix them up. Spaghetti is most common pasta used, but fettuccini, penne and rigatoni are also great choices.

Once you select your ingredients, there are a few tips you need for preparing out-of-this world pasta carbonara.

1. Start with perfectly cooked pasta. Cook it in ample water with a handful of salt. Master this cooking technique and your pasta will be restaurant quality.

2. Grate your cheese from larger pieces; do not waste your money on flavorless supermarket cheese in a shaker container.

3. Add the raw eggs to your hot pasta off the heat of the stove, or you risk scrambled eggs. Tasty but ugly.

4. Create a creamier sauce by adding a few tablespoons of the hot pasta cooking water. Don’t add too much water or your pasta will be swimming.

5. Fry the small pieces of meat slowly on a medium to medium-low flame to render them of their fat. You want the meat crispy, not charred—especially with guanciale.

6. Add several tablespoons of the rendered fat to the pasta—not all of it, as some meats release far too much fat to work well.

7. Keep to the five traditional ingredients: pasta, cured meat, cheese, eggs and black pepper. Less is more.

Perfetto!

Print a copy of my Spaghetti Carbonara and How To Cook Perfect Pasta for your convenience.