 Go on, take a bite. Just one and you’ll know why everyone screams for these ice cream sandwiches. To my mind, the wonderfully soft, dark chocolate wafers made with Dutch-process cocoa and deepened with espresso powder are perfection. Fill them with a generous scoop of your favorite flavored ice cream and you’ll never go back for store-bought again!
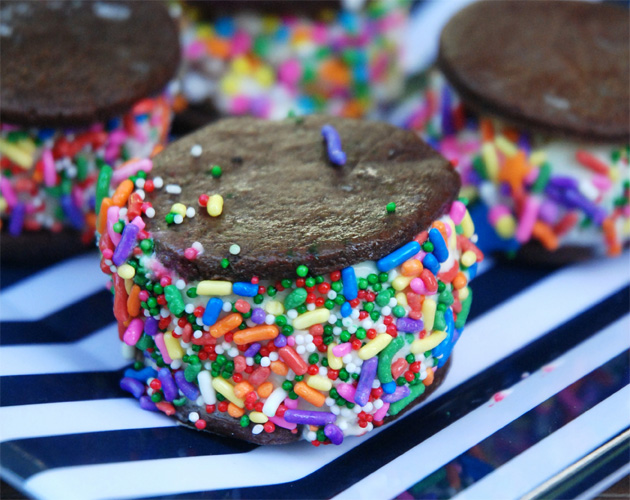
  Big eyes. Little tummies. The tiny-fingered crowd at my house loves the 2-inch rounds, especially when joyfully decorated with brilliantly colored sprinkles. Gone are the days of sticky, gooey puddles of abandoned too-big treats…or worse yet, tummy aches.
 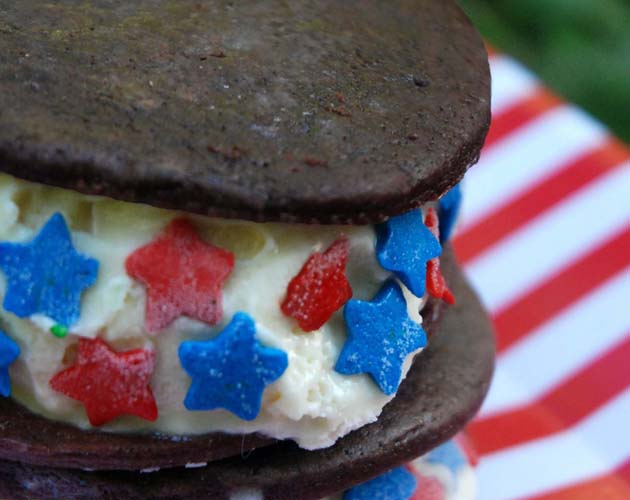 Big, full-sized ice cream sandwiches all decked out with red and blue stars for Independence Day tickle my fancy. What’s not to love? Be it declared: absolutely no guilt allowed. None. I bought my first chocolate wafer “sammie” off the ice cream truck that drove through my neighborhood on hot summer days. What a treat! Years later, there were no trucks in the hills of MillValley, so I made the sandwiches for my kids. We got creative and cut the wafers into our favorite shapes and filled them with what seemed like a million flavors: mint, vanilla, banana, cherry pecan, coffee and all the crazy Ben & Jerry mixtures. One thing is for sure, they are super easy and stress-free when you know a few tricks. 1. Roll the wafer dough 1/8-inch thick instead of the standard 1/4-inch. You want a thin, soft wafer that melds into the ice cream as you bite, finishing with wickedly good chocolate crumbs. 3. Bake the chocolate wafers until just set. You may fret thinking they’re still raw, but trust me and remove from the oven. They firm up as they cool and remain soft through the freezing process. Over-baked wafers become crisp and break easily. 4. After baking, place the cooled, empty, parchment-lined cookie sheets in the freezer for 15 minutes before filling. This helps prevent melting as you work—especially when the kitchen becomes hot during the summer months. 6. Soften the ice cream slightly—just enough to scoop—approximately 12 to 15 seconds in the microwave. 7. Working in batches, place six cookies on a flat working surface and fill with ice cream. Top with a second cookie. Lightly press the sandwiches to distribute the ice cream. Using clean hands quickly press the sprinkles or decorations on the sides of the sandwich. 9. Set the sandwiches on the cold cookie sheet in the freezer and firm up for several hours. Repeat the process until completed. 10. Hide your favorite ice cream sandwiches deep in the freezer or they’ll mysteriously disappear when you’re not looking. Today’s indulgence is tomorrow’s sweet memory. Print a copy of my Chocolate Wafer Ice Cream Sandwiches recipe for your convenience.
Hello Gorgeous!
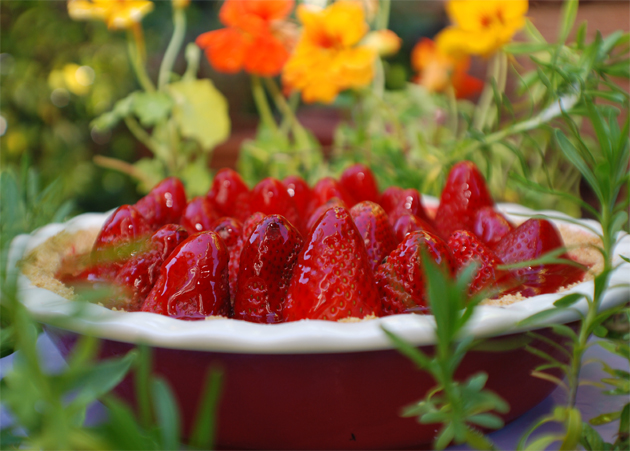
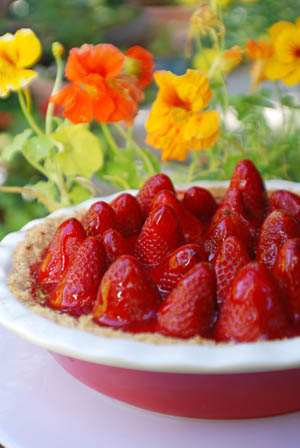
What makes this summer pie is so irresistible? Perhaps it’s the whole, glazed strawberries or the luscious layer of whipped cream cheese filling in a graham cracker crust. Or the fragrance that wafts up from the ripe, deep red berries? Then again, consider tossing your fork and swirling the strawberries in the cream with your fingers. No matter what—it’s pure pleasure to the last bite.
For the cook, it’s an easy, make-ahead pie. Just one important thing to remember: select the strawberries with care as the pie depends almost entirely on them for its flavor. Here are a few tips that will make your Strawberries and Cream pie a delicious showstopper.
First, trust me when I say never, never buy supermarket strawberries for this pie, as they will disappoint. Bred for size, shipping and long shelf life, these berries lack flavor, fragrance and depth of color.
Count on a trusted farmers market, independent produce dealer or farm stand and don’t be afraid to be picky. You’ll find the most wonderful small to medium sized, older strawberry varieties that are delicious and nutritious.
Selecting Strawberries:
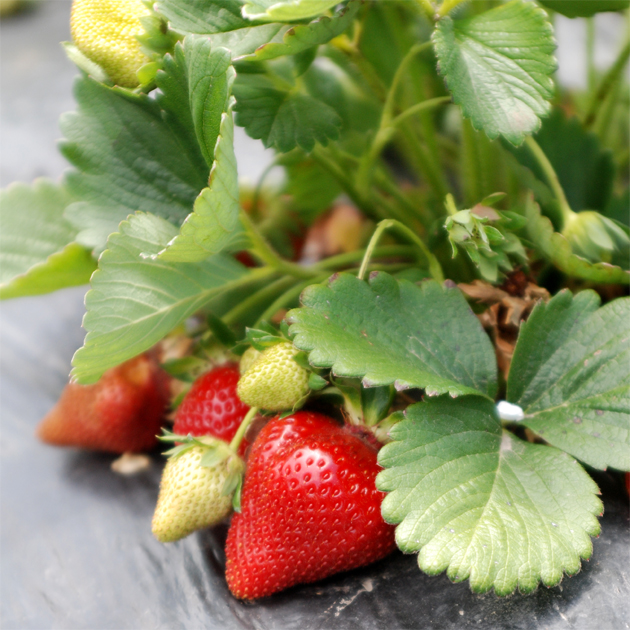
Once picked, strawberries do not ripen further—so don’t waste your money on mediocre berries in hopes that they’ll improve over time. It’s better to select perfectly ripe berries and enjoy them within a day or two.
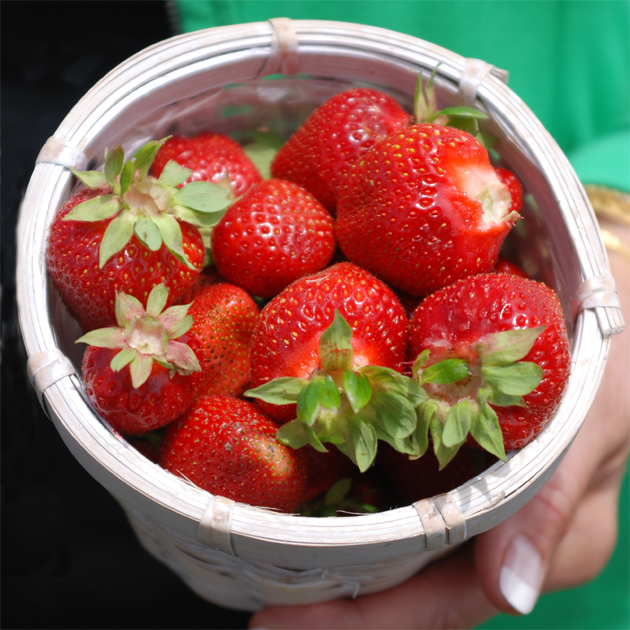
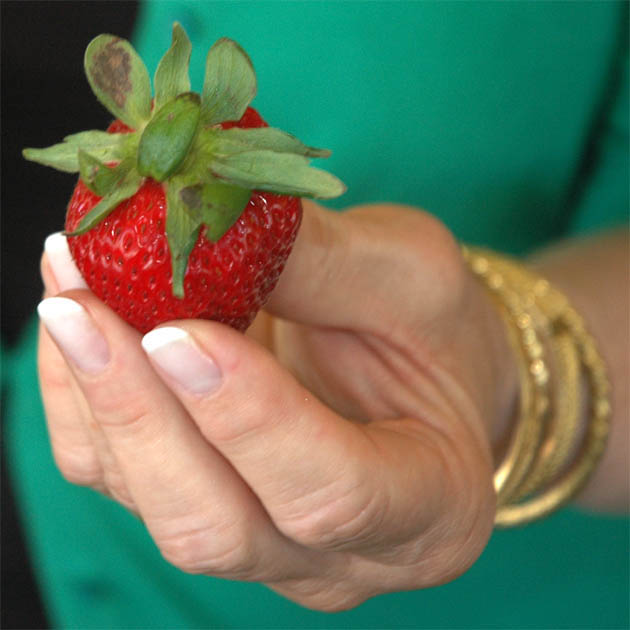
- Smell and examine your strawberries carefully. They should be fragrant, fairly firm and a deep red color with attached green caps.
- Promptly discard any moldy, shriveled or soft, squishy strawberries found among the good ones. Also get rid of berries with loose, discolored caps. All of these flaws are signs of age and possible mold, which can spread quickly and ruin the whole bunch.
- Do not purchase tightly packed baskets of strawberries that only reveal the top layer. They could be damaged and decaying underneath.
- Reject bleeding baskets of strawberries—another sign of age and decay.
Storing Strawberries:
Strawberries are best eaten within a day of purchase, but will keep for 2–3 days in the refrigerator when stored properly. For very best flavor, bring them to room temperature before using.
- Store berries unwashed, then rinse just prior to use.
- Store strawberries in the refrigerator in a paper bag or an airtight plastic container lined with paper towels to absorb moisture. Never store them in plastic bags, which speed decomposition.
- Do not store strawberries on the open counter exposed to sunlight and high temperatures.
- Check stored berries daily and remove any moldy, shriveled or soft ones. This helps keep the rest from rotting as well.
And now, the Strawberries and Cream Pie.
Print out a copy of my Strawberries and Cream Pie recipe for your convenience.
The bunny has come and gone. The family egg hunt and brunch is over. I, on the other hand have a truckload of green bunny grass to clean up and a dozen colored eggs left in the fridge.
Call me weird but the only thing on my mind at the moment is an egg salad sandwich.
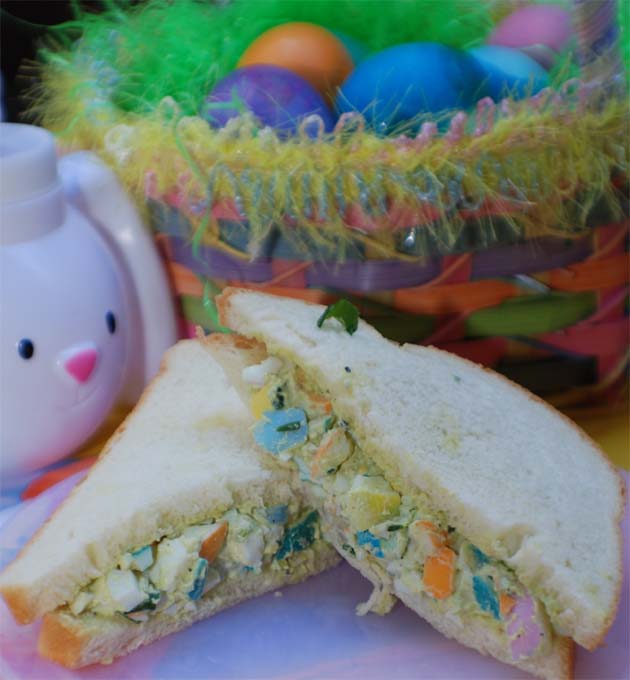
I absolutely love them and the day after Easter–it’s my kind of “holiday”. The recipe is simple and delicious with a bit of Dijon mustard and green scallions for kick and crunch. The fun comes when chopping up the leftover eggs stained brilliant shades of blue, green, pink, orange and yellow. Edible confetti.
Easter egg salad has been a family favorite at my house since the kids were tiny. As toddlers, they dropped and cracked lots of eggs on their way in and out of the dye pots. When peeling the eggs, we all discovered the interiors were stained the same colors! What fun. From then on everyone began cracking and peeling the eggs and a tradition was born.
Today, Sammy kept buzzing around the kitchen waiting for me to whip up the egg salad for lunch. Silly boy. I put him to work.
Before he knew it, I pulled up the stool and handed him an egg to peel. Let’s make this together.
Here, let me show you how to chop the egg with a big, sharp knife. Don’t worry, I’ll hold your hand.
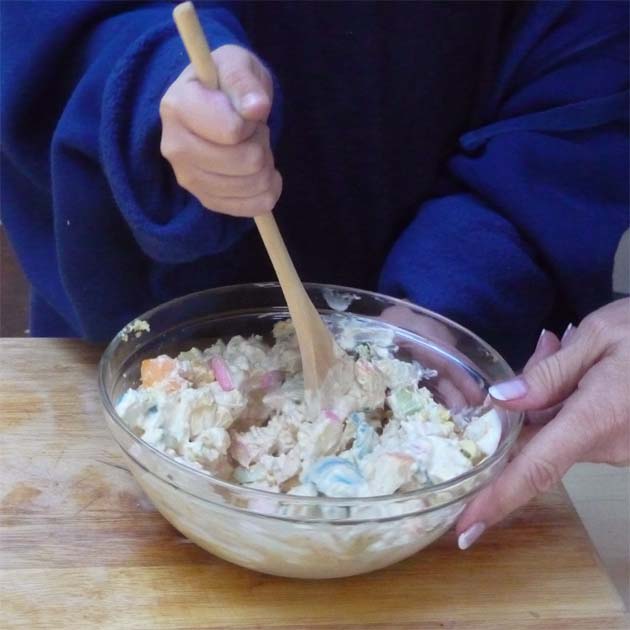
Place the eggs, mayo, mustard, scallions and salt and pepper in the bowl. Mix it up gently.
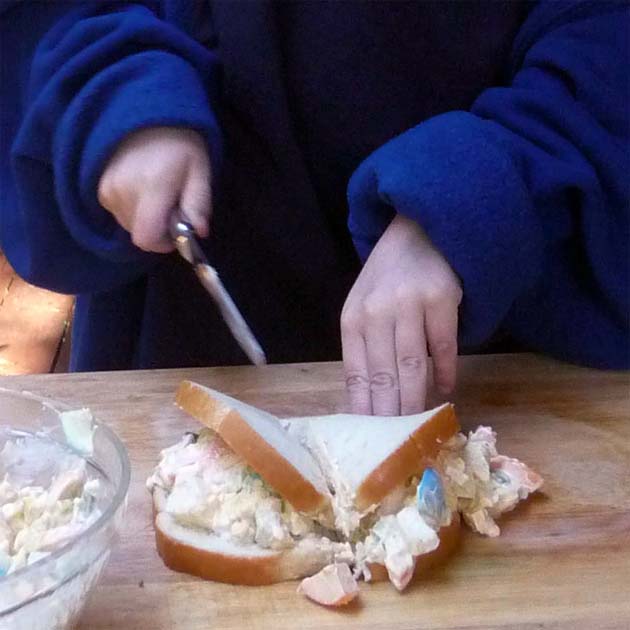
Now spread it all around the first piece of bread. It’s OK to slop it over a little.
“Here, Ma—I made you a sandwich—it’s the best one ever.” And so it was, for more than one reason.
Print out a copy of Easter Egg Salad Sandwiches for your convenience.
It smokes, it gurgles and bubbles, then spews orange marshmallow lava over a dark chocolate mountain of cake. The crowd goes wild!
I made my first Amazing Erupting Volcano Cake several years ago when Chef Catherine Christiansen sent the recipes for her Beyond Wonderful baking column. At first glance they seemed complex, but with a bit of planning the cake was easy and came together quickly. This cake is all about fun so don’t get hung up on perfection. Embrace all its lumps, bumps and crumbs—they add character and keep you sane.
First pick a theme, then let your imagination soar. I’ve made this cake with dinosaurs, super heroes…
Star Wars characters and …

…zombies—lots of zombies slipping and sliding in green slime.
You’ll find everything you need at cake supply, party and toy stores; from small bottles of brilliant red, orange and turquoise food coloring to plastic trees, edible rocks and a variety of characters, candles and costumes for added party fun.
Who can resist Darth Vadar and a Jedi Master blowing up the Amazing Erupting Volcano cake?
And with a little face paint and disgusting teeth, this birthday boy looks like he jumped off the zombie cake.
I bake the cakes and prepared the black chocolate and green buttercreams and the Kahlúa soaking syrup the day before assembly. Next day, I frost the cakes, made the sugar lava and lake and color the marshmallow lava. Assembly is a breeze and great fun. Once the Amazing Volcano stands before me in all its glory, I just can’t wait to blow it up! When it’s time, everyone gathers and holds their breath as I fuel the cake with cubes of dry ice, hot water, and warm lava. Then it starts—a little smoke—a few bubbles—lots of hoots and hollers—and over the side it goes. “That is so cool! I want that cake for my birthday.” “WOW!” Soon the group joins in a rousing chorus of Happy Birthday with intermittent giggles as the volcano continues its spectacular show.
As the lava…or oozing slime slows, everyone goes for the cake and just can’t believe how good it is. More than a few have a second piece, but my mind is always on the leftover chocolate frosting. No matter how delicious—and how spectacular—the cake, it’s hard to beat the thrill of pure buttercream, sneaked on the sly. Give me a spoon.
See more photos from the hilarious zombie birthday party on our Facebook page.
Get a printable copy of The Amazing Erupting Volcano Cake.
White chili is filled with wonderful flavors and textures: beans, shredded chicken, chiles, onions, garlic, cumin…. So why does it so often end up as a boring dish that’s just hot and nothing else?
I took a look at my old family recipe that I had not made in years and immediately saw why it’s always been a poor second cousin to the fiery red chili I love. With a few simple cooking techniques learned from Mexican and Indian cuisines, I’ve finally made white wonderful.
The obvious: Give up the seemingly quick and easy, expensive canned and bottled ingredients for fresh. If your chili is flavorless, you’re wasting your time.
Beans. Many standard recipes call for several jars or cans of fully cooked white cannellini beans that cost two to three dollars each. Home cooked great northern beans are economical and your best choice for texture and flavor. When combined with the other ingredients, great northerns absorb all the flavors, giving you a tasty, tender bean rather than the overcooked, mushy results you get with canned.
Chicken. White chili recipes often require breast meat that can be bland when poached in water. Long, ago, I learned that dark, flavorful thighs are preferred in Indian curries because they absorb the onion, garlic and spices while imparting their chicken goodness to the gravy. I decided to use half thighs and half breasts for flavor and the white color.
Stock. I prefer homemade chicken stock for absolutely best flavor, but realize that many home cooks reach for canned convenience. Make it low sodium and you’ll be fine.
Onions, garlic and spices. Sauté everything in the chicken fat, rather than ordinary oil, for richer flavor. When it comes to dry spices, I depend on the Indian method of roasting the cumin and coriander in a cleared area of the pan for 30 seconds before mixing them into the mixture.
Chiles. No canned chiles for this dish unless you absolutely can’t find fresh, mild pasillas and anaheims, as well as the hotter and more common jalapenos. My secret is fire-roasting the chilies for a deep smoky flavor. While it’s great fun to do this in the ashes of a wood-burning fireplace (try it if you have one!), the simplest approach is to use a gas range. Just follow these easy steps:
- Place the chiles over a high flame, turning them as they blacken.
- Remove the blackened chiles from the flame and immediately cover them with a clean towel.
- Let them sweat for 10 minutes.
- Remove the towel and peel off the charred skin with a paring knife or your fingers. Remove excess pieces of skin with a paper towel.
- Make a slit in each chile and carefully remove the seeds.
- Rinse the chiles in cool water to remove any remaining skin bits or seeds.
One last tip:Chileshave different heat levels throughout the year. The same variety that blew out your eyeballs one week may be meek another. Check with your produce person and always taste and adjust as you cook.
Now, this is a white chile you can be proud of. Ladle it in to bowls and top with chopped cilantro and lime wedges for spritzing. Add some hot, golden cornbread and life is good.
Print a copy of White Chili and How to Roast Chilies for your convenience.
